Table of Contents
Why El Nido is a Photographer’s Paradise
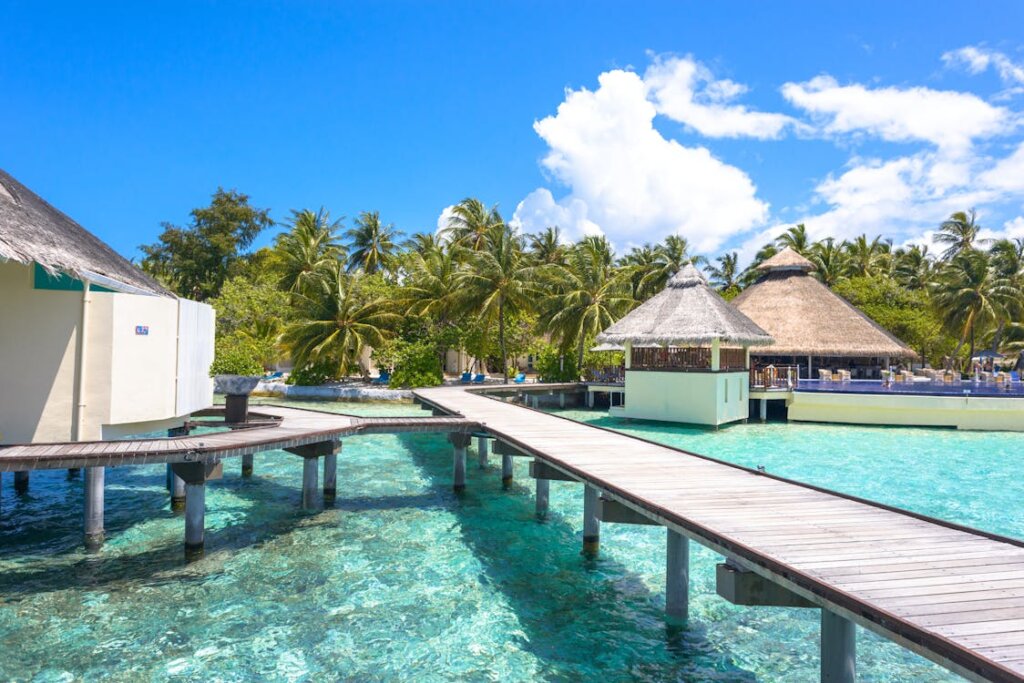
El Nido is one of the most photogenic places on earth. The combination of vertical limestone karsts rising from turquoise water, hidden lagoons accessible only by kayak, and a coastline that turns amber-gold at sunset creates photographic opportunities that are simply unavailable anywhere else in Southeast Asia.

Whether you shoot on a smartphone, a mirrorless, or a full-frame DSLR, El Nido will test your skills and reward your patience. This guide covers the best photography spots, optimal timing, drone regulations, underwater photography, and practical tips for getting the shots that justify the journey.
Best Photography Spots in El Nido
1. Big Lagoon — The Iconic Karst Shot
Best for: Wide-angle landscape, reflection shots
Best time: 7am–9am (before tour boats arrive)
Access: Tour A or private boat
Big Lagoon is the photograph that defines El Nido — the one you’ve seen on every travel magazine and Instagram feed. Towering limestone cliffs encircle a lagoon of impossibly clear water, creating perfect reflections in calm morning conditions. The challenge is getting there early enough to beat the crowds.
Photography tips:
- Book the earliest available Tour A departure (usually 8am from El Nido town) — or better, hire a private boat to arrive at 7am before the commercial tours
- Use a wide-angle lens (16–24mm equivalent) to capture the full karst scale
- Kayak hire inside the lagoon costs ₱200 — paddling to the back opens up foreground interest and removes the tour boats from frame
- The reflection is strongest in the first 90 minutes of the day before wind ripples the surface
- Shoot from low, near water level, for the most dramatic karst perspective
2. Secret Lagoon — Natural Frame Compositions
Best for: Environmental portraits, natural framing
Best time: 9am–11am (best light angle)
Access: Tour A (swim or wade through cave entrance)
The Secret Lagoon is reached by wading through a narrow cave opening — a natural frame that creates one of El Nido’s most compelling compositional opportunities. Shoot from inside the cave looking out, or from the lagoon looking back through the cave toward the open sea.
Photography tips:
- The cave entrance creates a natural leading line — position a subject (person, kayak) in the bright opening for silhouette shots
- Waterproof your camera: the wade in is knee-to-waist deep depending on tide
- Shoot from within the cave toward the lagoon for dramatic light-to-dark contrast
- The lagoon itself has clear shallow water — overhead shots (drone or elevated position) reveal the sand bottom beautifully
3. Nacpan Beach — Sunrise and Golden Hour
Best for: Sunrise beach photography, long exposures
Best time: 6am–7am (sunrise), 5pm–6:30pm (sunset)
Access: 45 minutes north of El Nido by tricycle
Nacpan’s 4km white-sand arc faces east, making it El Nido’s finest sunrise beach. The northern section (where the beach curves slightly and the coconut palms are tallest) is the best shooting position. At sunrise, the sky turns vivid pink-orange, the wet sand reflects the sky perfectly, and the beach is completely empty.
Photography tips:
- Bring a tripod for long exposure work — 30-second exposures smooth the water into silk at dawn
- The coconut palms at the northern end create strong leading lines toward the sea
- Shoot toward the south at sunrise for warm light on the cliff face at the far end of the beach
- At sunset: face west across the beach from the northern tip for warm backlit palm silhouettes
- Tide tables matter: low tide at sunrise reveals the widest sand and best reflections
4. Las Cabanas Beach — Sunset Panoramas
Best for: Sunset, zipline action shots, wide panoramas
Best time: 5pm–6:30pm
Access: 10 minutes from El Nido town
Las Cabanas faces west toward Cadlao Island — El Nido’s best-positioned sunset beach. The limestone silhouette of Cadlao against a golden sky creates dramatic compositions, and the beach’s zipline provides a rare action photography opportunity.
Photography tips:
- Arrive by 5pm to scout positions; the light changes fast in the final 30 minutes
- Shoot from the northern rocky headland for an elevated view looking down the beach toward Cadlao
- The zipline riders pass every 10–15 minutes — use a fast shutter (1/1000s+) for crisp action shots against the sunset sky
- After sunset, stay for blue hour — the 15–20 minutes after the sun drops produces soft purple-blue tones on the water
5. Matinloc Shrine — Elevated Lagoon Views
Best for: Aerial-style landscape, bird’s eye perspectives
Best time: 10am–12pm (overhead light for water colour)
Access: Tour C
The abandoned shrine on Matinloc Island requires a steep 10-minute climb, but the view from the top is among El Nido’s most dramatic — a bird’s-eye perspective over a hidden cove of electric-turquoise water with limestone islets scattered across the frame.
Photography tips:
- Climb to the highest accessible point of the shrine for the full panoramic view
- Mid-morning overhead light is critical here — it illuminates the shallow water from above, revealing the vivid blue-green gradient
- Use a polarizing filter to cut surface reflection and maximise water clarity in shots
- Shoot early in the tour before other boats arrive and anchor in the cove below
6. El Nido Town — Street and Culture Photography
Best for: Street photography, local life, blue hour cityscapes
Best time: 6am–8am (golden morning), 6pm–7pm (blue hour)
El Nido’s main town is compact, authentic, and full of photographic energy — fishing boats returning at dawn, local market stalls, tricycles weaving between tourists and locals, and a waterfront that turns magical at blue hour.
Photography tips:
- The public market (near the tricycle terminal) is most active 6am–8am — fresh catch being unloaded, vendors setting up
- The town’s main pier at blue hour (just after sunset) provides a classic composition: lit pier, moored bangkas, limestone karsts in background
- A 50mm equivalent lens works best for street work — not too wide, not telephoto, natural perspective
- Always ask before photographing local people; El Nido’s residents are generally welcoming when approached respectfully
Drone Photography in El Nido
El Nido’s lagoons and limestone formations are extraordinary from the air — but drone regulations in the Philippines are enforced and visitors must comply.
Philippines Drone Rules (2026)
| Rule | Requirement |
|---|---|
| Registration | All drones must be registered with CAAP (Civil Aviation Authority of the Philippines) |
| Max altitude | 400 feet (120m) AGL |
| No-fly zones | Airports (Puerto Princesa, San Vicente), national park restricted areas |
| El Nido Marine Reserve | Drone use requires special permit from DENR/ECAN — check current rules before flying |
| Commercial use | Additional permits required |
Practical advice: El Nido falls within the El Nido-Taytay Managed Resource Protected Area. Drone flying over the island hopping routes and lagoons technically requires DENR approval. Many visitors fly small consumer drones (DJI Mini series) without permits and are not challenged, but this is technically non-compliant. For a commercial shoot, secure permits in advance through the municipal tourism office.
Best Drone Shots in El Nido
- Nacpan Beach at sunrise — the 4km arc is stunning from 80m altitude
- Big Lagoon entrance — the transition from open sea to enclosed lagoon reads beautifully from above
- Cadlao Island and Las Cabanas — sunset from 120m shows the full El Nido bay panorama
- El Nido town from water side — the cluster of bangka boats and the limestone backdrop at golden hour
Underwater Photography in El Nido
El Nido’s waters have extraordinary biodiversity — and unlike the surface, underwater photography is not regulated beyond standard snorkel/dive rules.
Equipment Options
| Option | Best For | Cost |
|---|---|---|
| Smartphone + waterproof case | Casual snorkelling shots | ₱200–₱500 rental |
| GoPro Hero 12 | Action/video, wide-angle reef shots | Own or ₱500–₱1,000/day rental |
| Olympus TG-7 / OM-5 | Macro + wide, best compact option | Own |
| Mirrorless + underwater housing | Professional results | Own (expensive system) |
Best Underwater Subjects in El Nido
- Pinagbuyutan Island (Tour D) — strongest coral coverage, best for wide-angle reef photography
- Helicopter Island (Tour B) — colourful soft corals, parrotfish, wrasse
- Big Lagoon shallows — clear water, sandy bottom, easy macro subjects
- Open water off Seven Commandos Beach — regular sea turtle sightings
Tips:
- Shoot with natural light in water shallower than 5m — artificial light needed below that
- Get as close to subjects as possible before shooting — water reduces contrast and colour fast
- Shoot upward toward the surface for dramatic silhouette shots of snorkellers or fish
- The best light for underwater is 10am–2pm when the sun is high and penetrates deepest
Golden Hour & Blue Hour Guide for El Nido
| Time | Light Quality | Best Locations |
|---|---|---|
| 6:00–6:45am (Sunrise) | Warm orange-pink, low angle | Nacpan Beach, El Nido town pier |
| 6:45–9:00am (Morning) | Soft, neutral, excellent colour | Big Lagoon, Secret Lagoon (Tour A) |
| 9:00am–3:00pm (Midday) | Harsh overhead, ideal for underwater | Snorkelling spots, Matinloc Shrine |
| 3:00–5:00pm (Afternoon) | Softening, warm sidelight | Beach portraits, island hopping |
| 5:00–6:30pm (Sunset Golden Hour) | Warm gold, dramatic shadows | Las Cabanas, Corong-Corong beach |
| 6:30–7:00pm (Blue Hour) | Cool blue-purple, even light | El Nido town waterfront, pier |
Camera Gear Recommendations for El Nido
Smartphone Photographers
- Any recent flagship iPhone or Samsung handles El Nido’s landscapes excellently
- Essential addition: waterproof case or pouch (₱200 rental at most dive shops)
- Optional: clip-on wide-angle lens (Moment brand) for tighter lagoon shots
- Shoot in RAW (ProRAW on iPhone) for maximum editing flexibility
Mirrorless / DSLR Photographers
- Primary lens: 16–35mm f/2.8 or f/4 (wide-angle landscapes and lagoons)
- Secondary lens: 24–70mm or 50mm prime (street, portraits, blue hour)
- Filter kit: Polarizing filter (essential for water shots) + 6-stop ND (long exposures)
- Protection: Dry bag for gear on boat transfers — bangka spray is relentless
- Power: Bring 3+ batteries; charging opportunities are limited on full-day tours
Drone Photographers
- DJI Mini 4 Pro is the ideal El Nido drone — lightweight, excellent image quality, under 249g
- Bring 3 batteries minimum for a full-day shoot (30 min per battery, charging on boat is not reliable)
- ND filters for the drone are worthwhile in El Nido’s bright conditions
Practical Photography Tips for El Nido
- Protect your gear from saltwater: Bangka boat transfers involve significant spray. Use a waterproof dry bag or pelican case for all gear. More cameras are lost to saltwater damage than theft in El Nido
- Book private boat for photography-focused tours: Private bangka hire costs ₱2,500–₱4,000 for the day but lets you control timing, positioning, and departure times — critical for getting the first light shots at lagoons
- Cloud cover is not the enemy: Overcast days produce soft, even light that eliminates the harsh shadows of tropical midday — great for portraits and underwater shots
- Rain season (June–October) offers unique drama: Storm light and fast-moving cloud formations create extraordinary landscape shots that the dry-season blue-sky version cannot match
- Memory and power: Bring more storage than you think you’ll need. El Nido generates 500+ shots per day for active photographers. Carry a portable power bank
FAQ
What is the most photogenic spot in El Nido?
Big Lagoon (Tour A) is the most iconic photography location in El Nido — the combination of vertical limestone karsts, turquoise water, and enclosed reflective lagoon is unmatched. Matinloc Shrine (Tour C) offers the most dramatic aerial-style perspective from ground level.
Can I use a drone in El Nido?
Technically, drone use in El Nido’s marine protected areas requires a permit from DENR. Many visitors fly small consumer drones (DJI Mini series) without permits and are not challenged, but commercial and professional shoots require advance permits from the municipal tourism office and CAAP registration.
What camera settings work best for El Nido lagoons?
For lagoon shots in bright conditions: ISO 100, f/8–f/11, 1/250s–1/500s. Use a polarizing filter to cut surface reflection and reveal the water’s colour and depth. For golden hour: ISO 400–800, f/4–f/5.6, adjust shutter for correct exposure. For long exposures at dawn: ISO 100, f/8, 15–30s on tripod.
What time should I go to Big Lagoon for the best photos?
Arrive at Big Lagoon between 7am and 9am for the best conditions: calm water (best reflections), low-angle warm light (dramatic karst shadows), and minimal boat traffic. Book the earliest available Tour A departure or hire a private boat to control timing.
Is a waterproof camera necessary in El Nido?
A waterproof camera or waterproof case is strongly recommended. Bangka boat transfers involve significant saltwater spray, and the lagoon and snorkelling activities are impossible to photograph without waterproof protection. At minimum, use a waterproof pouch for your smartphone (₱200 rental at dive shops).
| Platform | Best For | El Nido Deals |
|---|---|---|
| Booking.com | Hotels, resorts, free cancellation | View deals → |
| Agoda | Best Asia prices, loyalty rewards | View deals → |
| Klook | Tours & activities | Browse tours → |