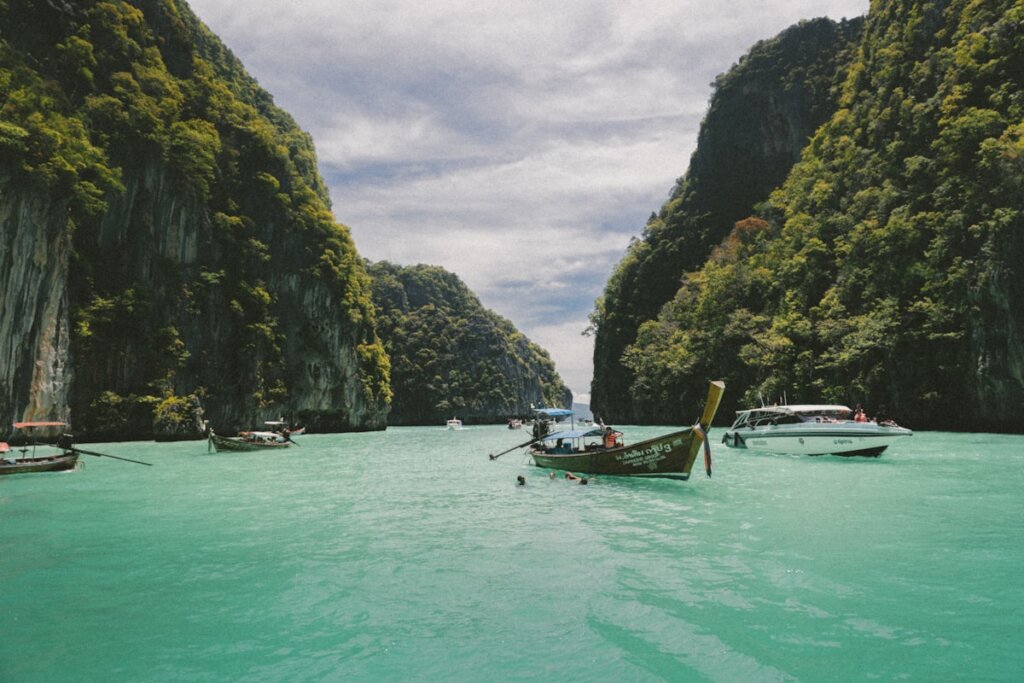

El Nido is one of the most photographed places in Southeast Asia — and once you arrive, it’s obvious why. Dramatic limestone karsts, impossibly turquoise lagoons, white sand beaches, and vibrant coral reefs create a landscape that almost photographs itself. But knowing where to shoot, when to be there, and how to capture the light can transform good shots into unforgettable ones.
This guide covers the best photography spots in El Nido for 2026 — from iconic viewpoints to hidden gems, sunrise locations to sunset perches, plus practical tips for cameras, drones, and underwater photography.
Best Photography Spots in El Nido
1. Big Lagoon (Tour A)
The Big Lagoon is arguably El Nido’s most iconic shot — that postcard image of turquoise water surrounded by towering limestone cliffs. For the best photos, arrive by kayak at low tide when the water is clearest and the lagoon’s aquamarine color is most intense. Shoot in the morning before tour boats arrive en masse.
- Best time: 8–10 AM (early light, fewer boats)
- Best angle: From the kayak looking toward the cliff face, or from the cliff edge above the entrance
- Tips: Use a polarizing filter to cut glare and saturate the water color; wide-angle lens for scale
2. Small Lagoon (Tour A)
More intimate than the Big Lagoon, the Small Lagoon rewards photographers with incredible reflections of limestone cliffs in still water. The enclosed space creates soft, diffused light even in the middle of the day. Best shot on a calm, overcast day when reflections are clearest.
- Best time: Any time the water is calm; overcast light flattens harsh shadows
- Best angle: From water level in a kayak, shooting toward the far wall
- Tips: Bring a waterproof housing or underwater camera — you’ll want to capture from the water
3. Secret Beach (Tour C)
One of El Nido’s most magical locations — a hidden beach accessed by swimming through a narrow underwater rock passage. Inside, sheer limestone walls enclose a small beach and crystal lagoon. The light inside is dramatic and golden in the early afternoon. Waterproof your camera — you’ll need to hold it above water while swimming through the entrance.
- Best time: 11 AM–1 PM (sun directly overhead illuminates the interior)
- Equipment: Waterproof camera or underwater housing essential
- Tips: Bring a waterproof bag for all electronics; the swim-through is short but fully submerged
4. Helicopter Island (Dilumacad)
Helicopter Island earns its name from its aerial silhouette — but from the beach, the views are equally spectacular. The long crescent beach with turquoise shallows and karst backdrop is one of El Nido’s best wide-angle compositions. Climb the hill on the northern end for aerial-style views over the bay.
- Best time: Morning (east-facing beach catches soft morning light)
- Best angle: From the hilltop looking south over the beach, or wide-angle from the waterline
- Tips: The hilltop scramble is steep — wear shoes with grip
5. Las Cabanas Beach (Sunset)
Las Cabanas is El Nido’s go-to sunset spot, and for good reason — the view west over offshore islands turns golden and then red as the sun drops. The zipline silhouettes against a sunset sky are a classic El Nido shot. Arrive by 5 PM to set up and scout your position.
- Best time: 5:30–6:30 PM (sunset; exact time varies by month)
- Best angle: From the beach looking west; or elevated position near the zipline platform
- Tips: Shoot in RAW for post-processing latitude on the high-contrast sunset scene; tripod useful for long exposures after sunset
6. Lio Beach (Sunset & Reflection)
Lio Beach offers equally stunning sunsets with a different feel — less crowded than Las Cabanas, more polished resort backdrop. At low tide, shallow water creates mirror-like reflections of the sunset sky. The walking beach at golden hour makes for excellent candid and landscape photography.
- Best time: 1 hour before sunset through dusk
- Tips: Shoot at low tide for reflections; wide-angle for sky-beach-karst compositions
7. Nacpan Beach (Long Beach, Aerial Perspective)
Nacpan’s 4 km stretch of undeveloped beach photographs beautifully from above — the long curve of white sand flanked by forested hills is one of the most dramatic drone shots in El Nido. On the ground, the beach is photogenic at any time of day.
- Best time: Morning for ground shots; any time for aerial
- Tips: Ideal drone location — relatively uncrowded and scenic
8. Cadlao Peak Viewpoint
The summit of Cadlao Island offers one of the most spectacular elevated views over Bacuit Bay — a 360° panorama of islands, lagoons, and the El Nido coastline. Hike early to catch the morning light, which illuminates the karsts from the east.
- Best time: 8–10 AM (morning light, clear skies before afternoon clouds)
- Tips: Bring a wide-angle lens; a panoramic stitch from the summit is stunning
Drone Photography in El Nido
El Nido is a drone photographer’s dream — aerial views of the lagoons, beaches, and karst formations are extraordinary. However, there are important rules to follow:
Drone Rules & Regulations
- CAAP registration required — all drones must be registered with the Civil Aviation Authority of the Philippines
- No flying over crowds or boats — standard aviation safety rules apply
- No flying in protected marine areas without a permit — check with local authorities
- Resorts may restrict drone use on their property — ask permission first
- Respect privacy — don’t fly over private beaches or people without consent
Best Drone Locations
- Nacpan Beach (wide, uncrowded, spectacular beach curve)
- Duli Beach (long exposed beach, few people)
- Cadlao Lagoon area (from water, not over tourist boats)
- El Nido town viewpoint (morning, city + bay panorama)
Underwater Photography in El Nido
The real magic in El Nido happens underwater. With world-class snorkeling and diving sites, an underwater camera is a must.
- Budget option: GoPro Hero (waterproof to 10 m without housing) — great for snorkeling, reef shots, wide-angle
- Mid-range: GoPro or compact camera with a dive housing — works to 40+ m, adds a red filter for color correction
- Advanced: Mirrorless camera with underwater housing, strobes for macro work
Tip: Use a red filter when snorkeling to compensate for the color absorption underwater — it restores warm tones that disappear below a few meters. See our El Nido Snorkeling Guide for the best snorkeling spots to photograph.
Camera Settings Tips for El Nido
Lagoon & Beach Shots
- Polarizing filter — essential for cutting glare and deepening water color; makes a massive difference on turquoise lagoons
- Aperture: f/8–f/11 for landscape sharpness
- ISO: 100 in bright light; keep it low to preserve color fidelity
- Shoot RAW — El Nido’s high contrast (dark cliffs + bright water) benefits from RAW’s dynamic range
Sunrise & Sunset
- Shoot 30 min before/after actual sunrise/sunset (golden hour and blue hour)
- Tripod recommended for long exposures in low light
- Bracket your exposures for HDR blending on high-contrast sunset scenes
Best Time of Year for Photography
| Season | Photography Conditions |
|---|---|
| December–February | Best — clear blue skies, calm water, excellent visibility |
| March–May | Very good — dry, can get hazy late dry season |
| June–October | Challenging — overcast, dramatic clouds (can be beautiful), rough seas limit access |
| November | Transitional — improving conditions, good light |
The wet season isn’t all bad for photography — dramatic cloud formations and moody light can produce stunning shots that look nothing like the typical El Nido postcard. But access to some sites is limited. See our full Best Time to Visit El Nido guide for more.
Quick Tips for El Nido Photographers
- Book early morning tours — you’ll have the lagoons to yourself before the crowds arrive
- Waterproof everything — sea spray, rain, and humid air are inevitable; use dry bags for all electronics
- Bring extra batteries — charging options on boats and remote beaches are limited
- High-capacity SD cards — you’ll shoot a lot more than you expect
- Respect local people — always ask permission before photographing individuals
- Use sun protection — shooting on open water means intense UV exposure all day
For inspiration and trip planning, see our El Nido Hidden Gems Guide and our El Nido First-Timers Guide.