El Nido Photography Guide – Capture Perfect Photos 2026

El Nido offers endless photography opportunities, from stunning landscapes to incredible marine life. This guide will help you capture the best photos of this tropical paradise.
Table of Contents
- Why El Nido is a Photographer’s Paradise
- Best Locations for Photography
- Photography Spots by Time
- Essential Photography Gear
- Camera Settings
- Composition Tips
- Best Photo Opportunities
- Underwater Photography Tips
- Drone Photography
- Post-Processing Tips
- Photography Tours
- Best Times for Photography
- Photography Etiquette
- Conclusion
Why El Nido is a Photographer’s Paradise
El Nido provides diverse subjects:
– Limestone cliffs – Dramatic karst formations
– Pristine beaches – Powder-white sand
– Crystal lagoons – Turquoise waters
– Marine life – Colorful coral reefs
– Sunrises and sunsets – Stunning sky colors
– Local culture – Rich Filipino heritage
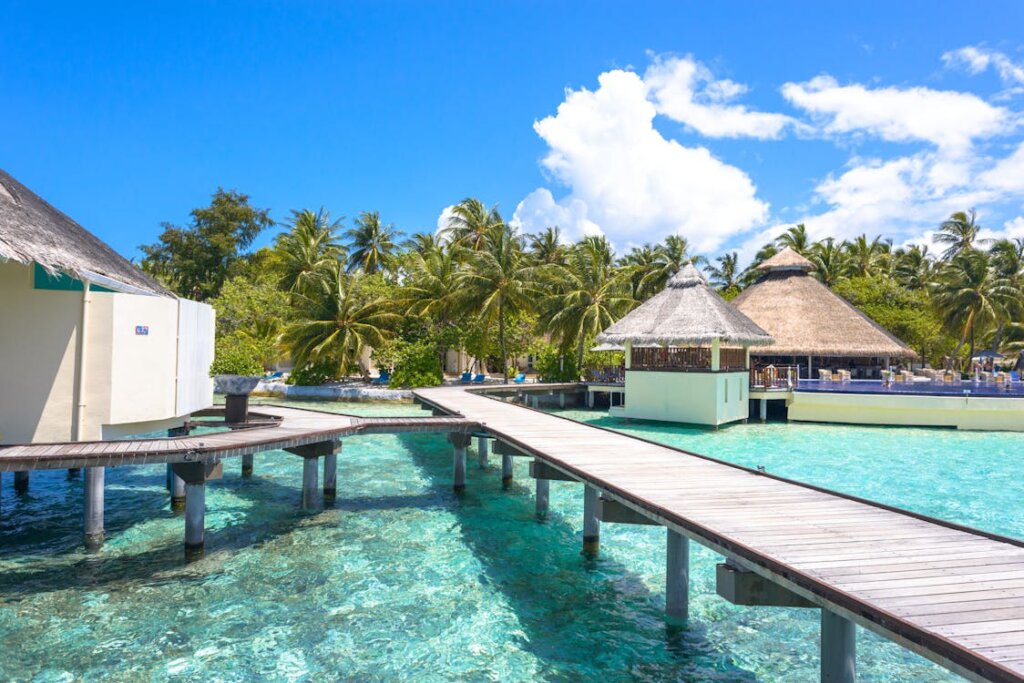
Best Locations for Photography
1. Big Lagoon
– Best for: Landscape, sunrise
– Tips: Arrive early (7 AM) for golden light and no crowds
– Composition: Kayak in center, limestone cliffs as background
– Time: Sunrise to mid-morning
2. Small Lagoon
– Best for: Intimate landscapes
– Tips: Swim through small entrance
– Composition: Cliff walls reflected in water
– Time: Morning light
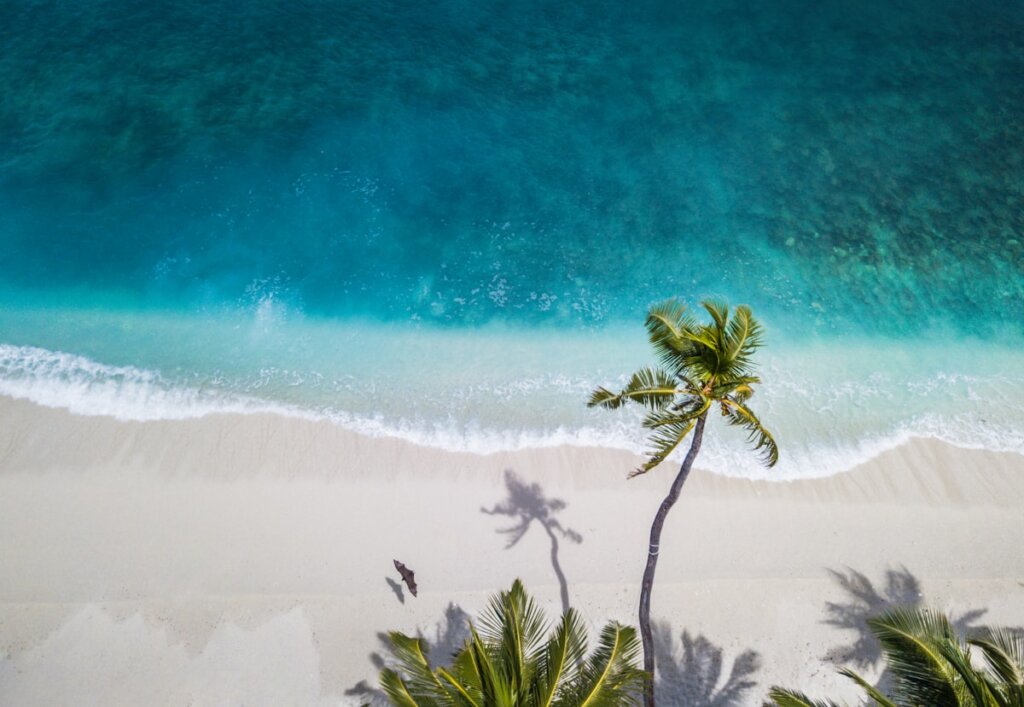
3. Nacpan Beach
– Best for: Beach landscapes, sunsets
– Tips: Climb small hill for panoramic view
– Composition: Twin beach panorama, palm trees
– Time: Sunset golden hour
4. Shimizu Island
– Best for: Underwater photography
– Tips: Snorkel or dive for coral reefs
– Composition: Fish schooling, coral close-ups
– Time: Midday (best light underwater)
5. Taraw Cliff Viewpoint
– Best for: Panoramic views
– Tips: Climb for 360-degree view
– Composition: Town, islands, ocean
– Time: Sunrise or sunset
6. Matinloc Shrine
– Best for: Dramatic shots
– Tips: Explore all angles
– Composition: Shrine with limestone backdrop
– Time: Morning light
7. Seven Commando Beach
– Best for: Beach activities, portraits
– Tips: Include beach elements
– Composition: Volleyball, sunbathers
– Time: All day
8. Corong-Corong Beach
– Best for: Sunset silhouettes
– Tips: Shoot into sun
– Composition: Palm trees, fishing boats silhouettes
– Time: Sunset golden hour
Photography Spots by Time
Sunrise Spots
– Big Lagoon
– Taraw Cliff
– East-facing beaches
Golden Hour (Sunset)
– Corong-Corong Beach
– Nacpan Beach
– Las Cabanas Beach
Midday (Underwater)
– Shimizu Island
– Helicopter Island
– Any snorkeling spot
Night Photography
– Star trails at Nacpan Beach
– Bioluminescent plankton (seasonal)
– Moonlit beaches
Essential Photography Gear
Camera Bodies
– DSLR/Mirrorless: Best for versatility
– Compact: Good for casual photographers
– Action camera: Essential for water activities
– Phone: Quality has improved significantly
Lenses
– Wide-angle (16-35mm): Landscapes, architecture
– Standard (24-70mm): Versatile, portraits
– Telephoto (70-200mm): Wildlife, compression
– Macro: Underwater details, flowers
Underwater Equipment
– Action camera (GoPro): Essential for water shots
– Underwater housing: For DSLR/mirrorless
– Red filter: Restores colors at depth
– Dome port: For over-under shots
Accessories
– Tripod: For long exposures
– Extra batteries: Heat drains quickly
– Memory cards: Bring plenty
– Lens cloth: Humidity fogs lenses
– Waterproof bag: Protect gear on boats
Camera Settings
Landscape Settings
– Aperture: f8-f11 (deep focus)
– ISO: 100-400
– Shutter: As needed
– White balance: Daylight or cloudy
Underwater Settings
– Aperture: f5.6-f8
– ISO: 400-1600
– Shutter: 1/125 or faster
– White balance: Use underwater mode or manual
Action/Shots
– Aperture: f2.8-f4
– ISO: Auto
– Shutter: 1/500+
Night/Star Photography
– Aperture: f2.8 or wider
– ISO: 1600-6400
– Shutter: 15-30 seconds (manual mode)
– Tripod: Essential
Composition Tips
Rule of Thirds
Place key elements at intersection points for dynamic compositions.
Leading Lines
Use cliffs, shorelines, and kayaks to guide the viewer’s eye.
Framing
Use natural frames like rock formations or palm trees.
Reflections
El Nido’s calm waters are perfect for mirror reflections.
Scale
Include people, boats, or divers to show scale.
Patterns
Look for repetitive elements in coral, waves, or shadows.
Best Photo Opportunities
1. Limestone Cliffs at Sunrise
– Location: Big Lagoon, Viewpoint
– Technique: Arrive before sunrise
– Settings: f8, ISO 200, shoot RAW
2. Turquoise Lagoon
– Location: Big Lagoon
– Technique: Shoot from water level
– Settings: f8, ISO 100, polarizing filter
3. Underwater Turtles
– Location: Any reef
– Technique: Get close, be patient
– Settings: f5.6, ISO 400+, fast shutter
4. Beach Panoramas
– Location: Nacpan Beach
– Technique: Stitch multiple images
– Settings: f11, ISO 100
5. Sunset Silhouettes
– Location: Corong-Corong
– Technique: Expose for sky
– Settings: f8, ISO 200
6. Kayak in Lagoon
– Location: Big Lagoon
– Technique: Position kayaker centrally
– Settings: f8, ISO 100
7. Fishing Boats
– Location: El Nido Bay
– Technique: Morning mist, blue hour
– Settings: f5.6, ISO 400
8. Local Life
– Location: Town market
– Technique: Ask permission, be respectful
– Settings: f2.8, ISO 800
Underwater Photography Tips
Getting Started
1. Get comfortable swimming with camera first
2. Practice in pool before open water
3. Use auto mode initially, then progress to manual
Lighting
– Surface: Bright, harsh light
– 5-10m: Best natural light
– 15m+: Need artificial light
Stability
– Kick gently to avoid stirring sediment
– Hold camera steady or use reef stick
– Breathe slowly to reduce movement
Subjects
– Stay still and let fish come to you
– Get low for better angles
– Focus on eyes for marine life portraits
Common Mistakes
– Getting too far away – Get close, water reduces quality
– Chasing fish – They won’t stay
– Not checking focus – Review immediately
– Forgetting white balance – Colors lost at depth
Drone Photography
Legal Requirements
– Register drone with local authorities
– No-fly zones: Near airports, protected areas
– Altitude limit: Typically 120m
Best Drone Shots
– Aerial beach panoramas
– Overwater island views
– Lagoon aerial views
– Sunset from above
Tips
– Check battery – Bring extras
– Wind conditions – Can be gusty near cliffs
– Return point – Know where you launched
Post-Processing Tips
Basic Edits
– Exposure: Adjust highlights/shadows
– White balance: Correct color cast
– Contrast: Add depth
– Saturation: Enhance colors slightly
– Crop: Improve composition
Underwater Photos
– Remove blue/green cast – Add warmth
– Enhance contrast – Bring back detail
– Sharpen – Add definition
Export Settings
– JPG: For sharing, high compression
– PNG: For printing
– RAW: Maximum quality for editing
Photography Tours
Professional Tours Available
– El Nido Photography Tours
– Sunrise Photo Walks
– Underwater Photography Courses
What They Offer
– Professional photographer guide
– Ideal locations
– Model arrangements
– Equipment rental
Best Times for Photography
By Season
December – March (Peak)
– Best weather
– Clear skies
– More crowded
April – May (Shoulder)
– Good light
– Fewer crowds
– Slightly cheaper
June – November (Green Season)
– Dramatic skies
– Lush greenery
– Cheapest rates
By Time of Day
| Time | Best For | Light Quality |
|——|———-|—————|
| 5:30-6:30 AM | Sunrise | Soft, golden |
| 6:30-9:00 AM | Morning landscapes | Warm |
| 9:00 AM – 3:00 PM | Underwater | Harsh overhead |
| 3:00-5:00 PM | Afternoon beach | Good |
| 5:00-6:30 PM | Sunset | Golden, red |
| 6:30-8:00 PM | Blue hour | Cool |
Photography Etiquette
1. Ask permission before photographing locals
2. Don’t touch coral for better shots
3. Respect wildlife – Don’t chase or disturb
4. Leave no trace – Take all equipment and trash
5. Share photos – Tag locations appropriately
Conclusion
El Nido offers incredible photography opportunities for all skill levels. With the right preparation and timing, you’ll capture stunning images of this tropical paradise. Remember to respect the environment and local culture while pursuing the perfect shot.
—
Tags: El Nido photography, El Nido photo guide, El Nido best photos spots, El Nido drone photography, El Nido underwater photography, El Nido travel photography
| Platform | Best For | El Nido Deals |
|---|---|---|
| Booking.com | Hotels, resorts, free cancellation | View deals → |
| Agoda | Best Asia prices, loyalty rewards | View deals → |
| Klook | Tours & activities | Browse tours → |