
Tide timing quietly decides whether your El Nido day feels effortless or frustrating. This guide focuses on reading tides specifically for independent travelers and tour planners who want to get the best out of lagoons, sandbars and beaches. You will learn how high and low water change access, what to ask your boat crew, and how a quick look at a tide table can save you from wading through shallow lagoons or arriving at a beach that has nearly disappeared.
- Why Tides Matter in the Bacuit Archipelago
- How to Read a Tide Table in Five Minutes
- Tide Effects on Lagoons and Tour Stops
- Tides, Snorkeling and Reef Safety
- Sample Tide-Matched Island Day
- Common Tide Mistakes Travelers Make
- Tide Tools and Apps That Help
- Tides for Kayaking, Paddleboarding and Shoreline Walks
- Tides and Photography
- A Simple Tide-Aware Planning Checklist
- Frequently Asked Questions
Why Tides Matter in the Bacuit Archipelago
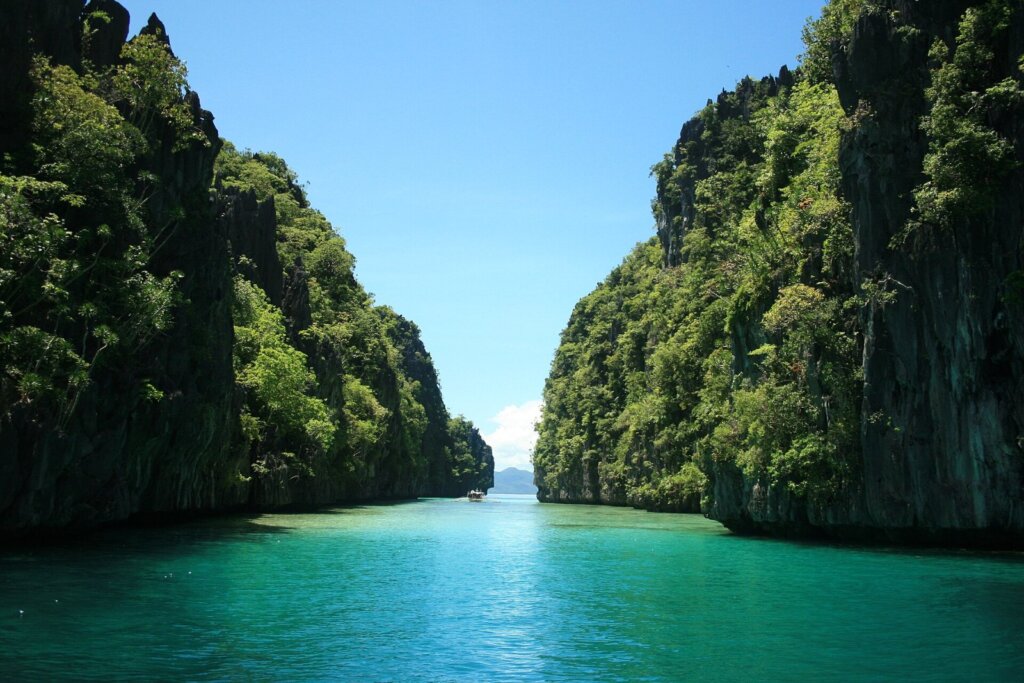
El Nido’s attractions are tucked among limestone islands, narrow channels and shallow lagoons. Water level affects how a boat enters a lagoon, how wide a beach appears, how clear the water looks and how comfortable snorkeling or kayaking feels. At high water, wide channels allow easy passage and sandbars sink out of sight. At low water, exposed sand and rocks create photo-friendly flats, but some lagoon entrances become shallow, and boats may have to anchor farther out.
The Philippines generally experiences mixed tides, where the height of high and low water and their timing can vary from day to day. That is why you cannot memorise a single rule. Check the day’s data and compare it to your planned stops.
How to Read a Tide Table in Five Minutes
- Find a trusted source with a table for Palawan or El Nido and set the correct date and time zone.
- Locate the high and low entries, noting the time and the height in metres.
- Check how large the difference is. A bigger range means stronger currents and more dramatic shoreline changes.
- Match the times to your itinerary. Mark when each stop falls relative to high or low water.
- Note sunrise and sunset so you can plan photography or sunset trips around the tide.
National agencies publish official tide predictions, and NAMRIA issues tide tables for Philippine waters. For forecasts that affect sea state, the PAGASA website is useful, and weather.com can help with wind and rain.
Tide Effects on Lagoons and Tour Stops
| Stop type | High tide | Low tide | Planning tip |
|---|---|---|---|
| Big and small lagoons | Easy boat and kayak access | Shallower entrance, may require wading | Visit near mid to high tide; read our Big Lagoon guide |
| Sandbars and shoals | Often submerged | Exposed and photogenic | Aim for lower water for walking and photos |
| Wide beaches | Narrower strip of sand | More space for play | Go at lower tide with kids |
| Snorkeling reefs | Better depth over coral | Risk of touching shallow coral | Choose mid tide for safe clearance |
| Rock pools | Covered | Exposed, see tide pooling guide | Plan a low tide walk |
Most shared tours follow a fixed route that ignores the tide, so use your tide check to ask the crew which stops they might swap. A good operator will adjust the order when the lagoon entrance is shallow.
Tides, Snorkeling and Reef Safety
Low tide brings coral closer to the surface, increasing the chance of accidental contact that damages the reef and scratches skin. Mid to high water is safer for snorkelers, though currents may be stronger in channels. Always wear a life vest if you are not a confident swimmer, avoid standing on coral, and follow your guide’s briefing. If you tend to feel queasy on rolling swells, our seasickness tips help on slow tidal days. For snorkeling spots and etiquette, see our snorkeling guide.
Strong tidal flow can occur near channel mouths. If you feel a current pulling you, signal the boat, do not fight it, and swim across rather than against it.
Sample Tide-Matched Island Day
Imagine a day with low water around mid-morning and high water in the late afternoon. A sensible plan would start with beaches and sandbars while the sand is exposed, move to snorkeling at mid tide for safe coral clearance, and save lagoon kayaking for the rising water when entrances are deeper. Reverse the order if low tide falls in the afternoon. The aim is not perfection but avoiding the worst mismatches, such as arriving at a lagoon entrance at its shallowest or snorkeling right over exposed coral.
| Tide pattern | Morning | Midday | Afternoon |
|---|---|---|---|
| Low early, high late | Beaches, sandbars, rock pools | Snorkeling at mid tide | Lagoon kayaking on rising water |
| High early, low late | Lagoon visit at best access | Snorkeling over deeper coral | Beach and sandbar walks |
| Low at midday | Lagoon first, before water drops | Rest in shade or boat lunch | Late snorkel as water rises |
Common Tide Mistakes Travelers Make
The most frequent mistake is assuming every day looks the same as the photos online. A lagoon that looks deep and glassy in one picture may be a shallow flat in another. Travelers also underestimate how fast water rises on shallow beaches, leaving bags or towels in the wash. Others forget that tidal range changes across the month, so the same time of day can mean very different water levels on different days. Finally, many people ignore wind: a strong wind against the tide can create chop in channels even when the sea looks calm from the beach.
Avoid these by checking the table, speaking to the boat crew and keeping valuables in a dry bag on the boat rather than on the sand. If you are working through a long itinerary, our guide to morning versus afternoon island hopping helps you decide which time of day suits each stop.
Tide Tools and Apps That Help
Several free tools provide tide curves and predictions, but always verify against official or local data because station locations may differ from the lagoons you visit. Save the tide table offline on your phone since signal on the water is unreliable. A simple printed note with high and low times for your tour day is often the easiest option. Ask your hotel front desk, as staff often know local conditions better than any app. Combine these with weather updates before you leave the dock, and respect the crew’s decision if they change the route for safety.
Tides for Kayaking, Paddleboarding and Shoreline Walks
Kayakers benefit from planning around the tide because paddling against a strong flow in a narrow passage is tiring. Start the leg with the current when possible, and keep a margin for the return trip. Shoreline walks and beach-hopping on foot depend on low water to open up passages around rocky points. Never walk on rocks that could be cut off by a rising tide, and check the time of the next high before heading out. Wear reef shoes, carry water and tell someone your route.
Tides and Photography
For dramatic photos, low tide exposes patterns in the sand, rock textures and mirror-like pools. High tide gives deeper turquoise colour over sand and clean horizon lines. Combine a tide check with sun angle: golden hours near a low tide produce some of the best images. Our sunset spots guide lists places to catch evening light.
A Simple Tide-Aware Planning Checklist
- Check the tide table the night before and again in the morning.
- Tell the crew your priority stop and ask when it is best to visit.
- Bring reef shoes and a dry bag for wading.
- Keep a buffer so a shallow lagoon does not push you into a rushed return.
- Have a backup plan for rough or low-water days; see our indoor day options.
With a few minutes of preparation, you can turn tides from a surprise into an advantage and enjoy smoother, calmer, more photogenic days around the islands.
One more habit worth adopting: take a quick photo of the tide table on your phone and share it with your travel companions, so everyone understands why the plan may change. If a stop disappoints because of the water level, treat it as a reason to return on another day rather than a failure. El Nido has dozens of beaches and lagoons, and a flexible attitude toward the tide usually leads to quieter, prettier discoveries than a rigid checklist ever could. When in doubt, ask the local boat crew; they read these waters every day and know which channels, sandbars and reefs behave best at each stage of the tide.
For wider planning, weather.com and the Philippine Department of Tourism are useful companions to your tide table, helping you check wind, rain and any local advisories before heading to the pier. Tide, wind and swell together decide how comfortable the boat ride will be, so treat the three as one picture rather than separate numbers.
Finally, ask the crew to point out which channels flow strongest and which beaches stay wide at high water. That local knowledge, combined with your table, turns a good day into an excellent one.
Happy tide watching, and remember that patience at the pier pays off all day.
Frequently Asked Questions
Does tide really change El Nido tours?
Yes. It affects lagoon access, beach width, snorkeling safety and photo conditions, so a quick check helps.
Is high or low tide better for the Big Lagoon?
Mid to high tide generally makes boat and kayak access easier, but ask your crew for the day’s advice.
Where can I find tide times?
Use official sources such as NAMRIA tide tables and confirm local timing with your boat crew.
Is low tide good for snorkeling?
Be careful. Coral can be close to the surface, so mid to high tide is usually safer for clearance.
Can tides make tours cancel?
Tides alone rarely cancel a trip, but combined with wind and swell they can change the route.
What should I wear for tidal flats?
Reef shoes, quick-dry clothes, and sun protection. Carry a dry bag for valuables.